
Zoey Cardigan - Week 4
The last week of February? Already? How on earth did that happen? Wasn't it the first day of January like last week? Oh man!
So the last week of February means its the 4th week of the KAL and we're making some good progress on the body. I know things are pretty quiet on the Rav discussion and on Instagram which leads me to believe that folks are plugging away happily on the cardigan... I hope you're still having fun. I know the raglan increases take a long time but you can DO it!
Jessica is still working away on her raglan increases and its looking great:

And Missy has come up with a great self-made chart to assist her with the increases. I love how each knitter thinks just a little differently from one another but that we always find a way to make it work for ourselves.

If you're still working on your increases, keep at it. All the effort is worth it in the end!
I've been working at keeping up with the schedule of the KAL so I've now knit half of my body. Let's take a moment to discuss how I know it's half without using a tape measure.
Row Gauge - the more you know...
I know from reading through the pattern that I will need 14-inches of body before the ribbed hem at the bottom. So using my row gauge of 25 rows = 4" I divide 25 rows by 4 since I want to find out the number of rows per inch I get: 25 ÷ 4 = 6.25 rows/inch. I know I need 14" total so I then multiply: 6.25 x 14 = 87.5. Obviously half a row won't do so I round up to 88 rows to complete my 14 inches of body. Buuuuuuut, since I only want to do half that obviously I just knit 44 rows.

Thankfully, 44 rows encompasses all of the stripes and then some so I'm done with the colorwork of the body for now. Now I just have to complete the remaining 7-inches of body before moving on to the ribbing.
Bottom Hem
So let's talk about the Hem. Some of you may have adjusted your stitch count to match your gauge rather than changing your needle to match gauge. If that's the case, then the Hem section may differ for you. So here's some tips on sorting out how to work the ribbing so you have an even number of knit stitches on either side of your sweater.
Start by adding up all the stitches on your needles; since I'm making the Large size, I should have 188 sts on the needle - 48 sts on each front half of the sweater and 92 stitches between the stitch markers on the back of the sweater. Since we're working the ribbing in 2 x 2 (k2, p2) we want to find out how many instances of 2 x 2 rib we will get. So I divide 188 by 4 (since to complete a 2 x 2 repeat it's 4 stitches) and get 47. Oh drag...
Wait, what? That's not good? Well... kinda not. In most cases you want a round number when dividing the ribbing but in this case we want to START and END with knit stitches so that we have all knit stitches to pick up and knit when we do the front band. What we REALLY want is a half number... like 46.5 so that we would (k2, p2) across the whole row 46 times and then END with 2 k sts.
So instead, what I'm going to do is start with k3, and then work (p2, k2) across the row 46 times - which will leave me with 1 st remaining and I will knit that last stitch. So now I have 3 knit stitches on either end and a 2 x 2 rib between it.
Long story short, add up your stitches and find out if you get a whole number or a half number.
If you get a half number, work in (k2, p2) to the last 2 sts, then knit those last 2 sts.
If you get a whole number, start with k3, work in (p2, k2) rib to the end and then knit the last stitch.
Tidying Up
If you get through the body of the sweater and want to do something productive before we start the sleeves next week, why not tackle all those loose ends?
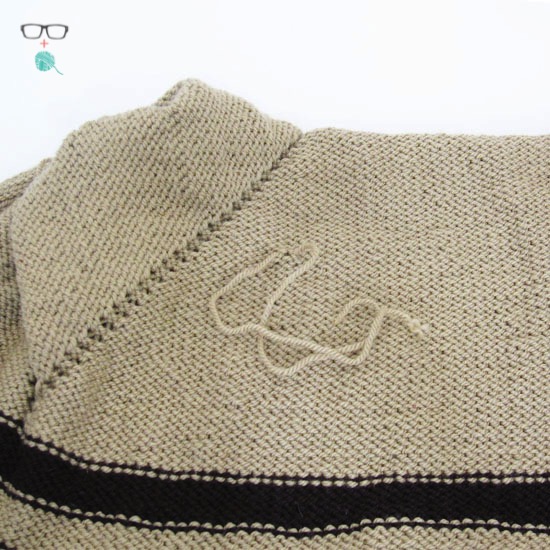
I tend to keep my tails about 8 inches long so I have a lot of play when I'm cleaning up my ends but shorter or longer is fine. I've done up a quick video to show how I weave in my ends to avoid any kind of visibility of the joins on the RS of the sweater.
The video addresses a situation when we have two same-color yarns joining in the middle of a section but the same theory will apply to all the stitches at the end of the row where we've done our striped work. In that case, however, you'll want to weave your stripe color tail into a stripe section and the main color tail into a main color section of the stripes.
Making video tutorials is hard since, as mentioned above, everyone thinks about the techniques a little differently. If anything in this video is unclear let me know and I'll try to write it out or photograph it a little differently but essentially we're mimicking the purlside of the work so avoid any visibility on the RS.
Stay in touch!
To stay in touch with me and the other folks participating in this KAL, join our group on Ravelry, tag me on Instagram and use #zoeycardigankal and #unapologeticknitter.
And by all means, if you have questions, email me at meaghan@unapologeticknitter.com or message me on Rav (SoCalMeaghan), leave a comment here, or leave questions in the Discussion board.
**NOTE**
To make sure I see any immediate questions or concerns on Ravelry please be sure to ear-burn me (despite me being the owner of the discussion board, I don't get notified when people comment unless I'm tagged). So, if it's urgent, please be sure to ear burn me.
To do this enter my username in square brackets and follow it by tying the word "person" in parenthesis: [socalmeaghan](person).
Happy Knitting!!!